View informational layers on a map
Informational layers are created in the Map Settings page within the BlackBerry AtHoc system and are not specific to the current alert. The same layers can be viewed in every alert template.
To enable operators to view multiple layers simultaneously, the Map screen includes a Layers icon. Selecting layers from this list adds them to the map for informational purposes: they can be seen, but not clicked. In contrast, the Select Predefined Location button allows operators to select a location from a single layer at any given time.
An alert map contains multiple map layers, each of which provides information about the location and target audience for the alert.
- Open the alert map.
- In the bottom left corner of the screen, click
 .
. - SelectOrganizationsin theLayerslist to view all of your connected organizations within the current map area. To view organization details, click the corresponding
 .
.  If more than one object exists at or very close to the same geo-location coordinates, click
 to see the details of the other organization.
 - SelectLive Incoming Alertsin theLayerslist to view all of the incoming alerts that fall within the current map area and include location information. To view incoming alert details, click the corresponding
 .
. - Click the check box next to any of the Layers check boxes to see it displayed on the map. The difference between selecting a predefined location in theSelect Predefined Locationsdrop-down list and doing so in theLayerspanel is that the location is not interactive when selected in the Layers panel. This non-clickable status is indicated by the use of lighter shading and dotted lines around the edges of the locations, as shown on the right in the following image:
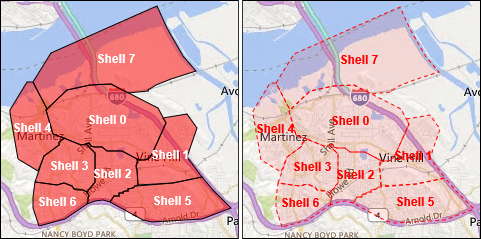 Custom locations are not listed on the Layers panel.