Update the NDS database connection in the application server registry
NDS
database connection in the application server registryAfter you install each application server, update the
NDS
database connection in the registry on that server.- From theStartmenu, typeREGEDIT.The registry opens.
- (Standalone mode only) ExpandHKEY_LOCAL_MACHINE>Software>Wow6432Node>AtHocServer.
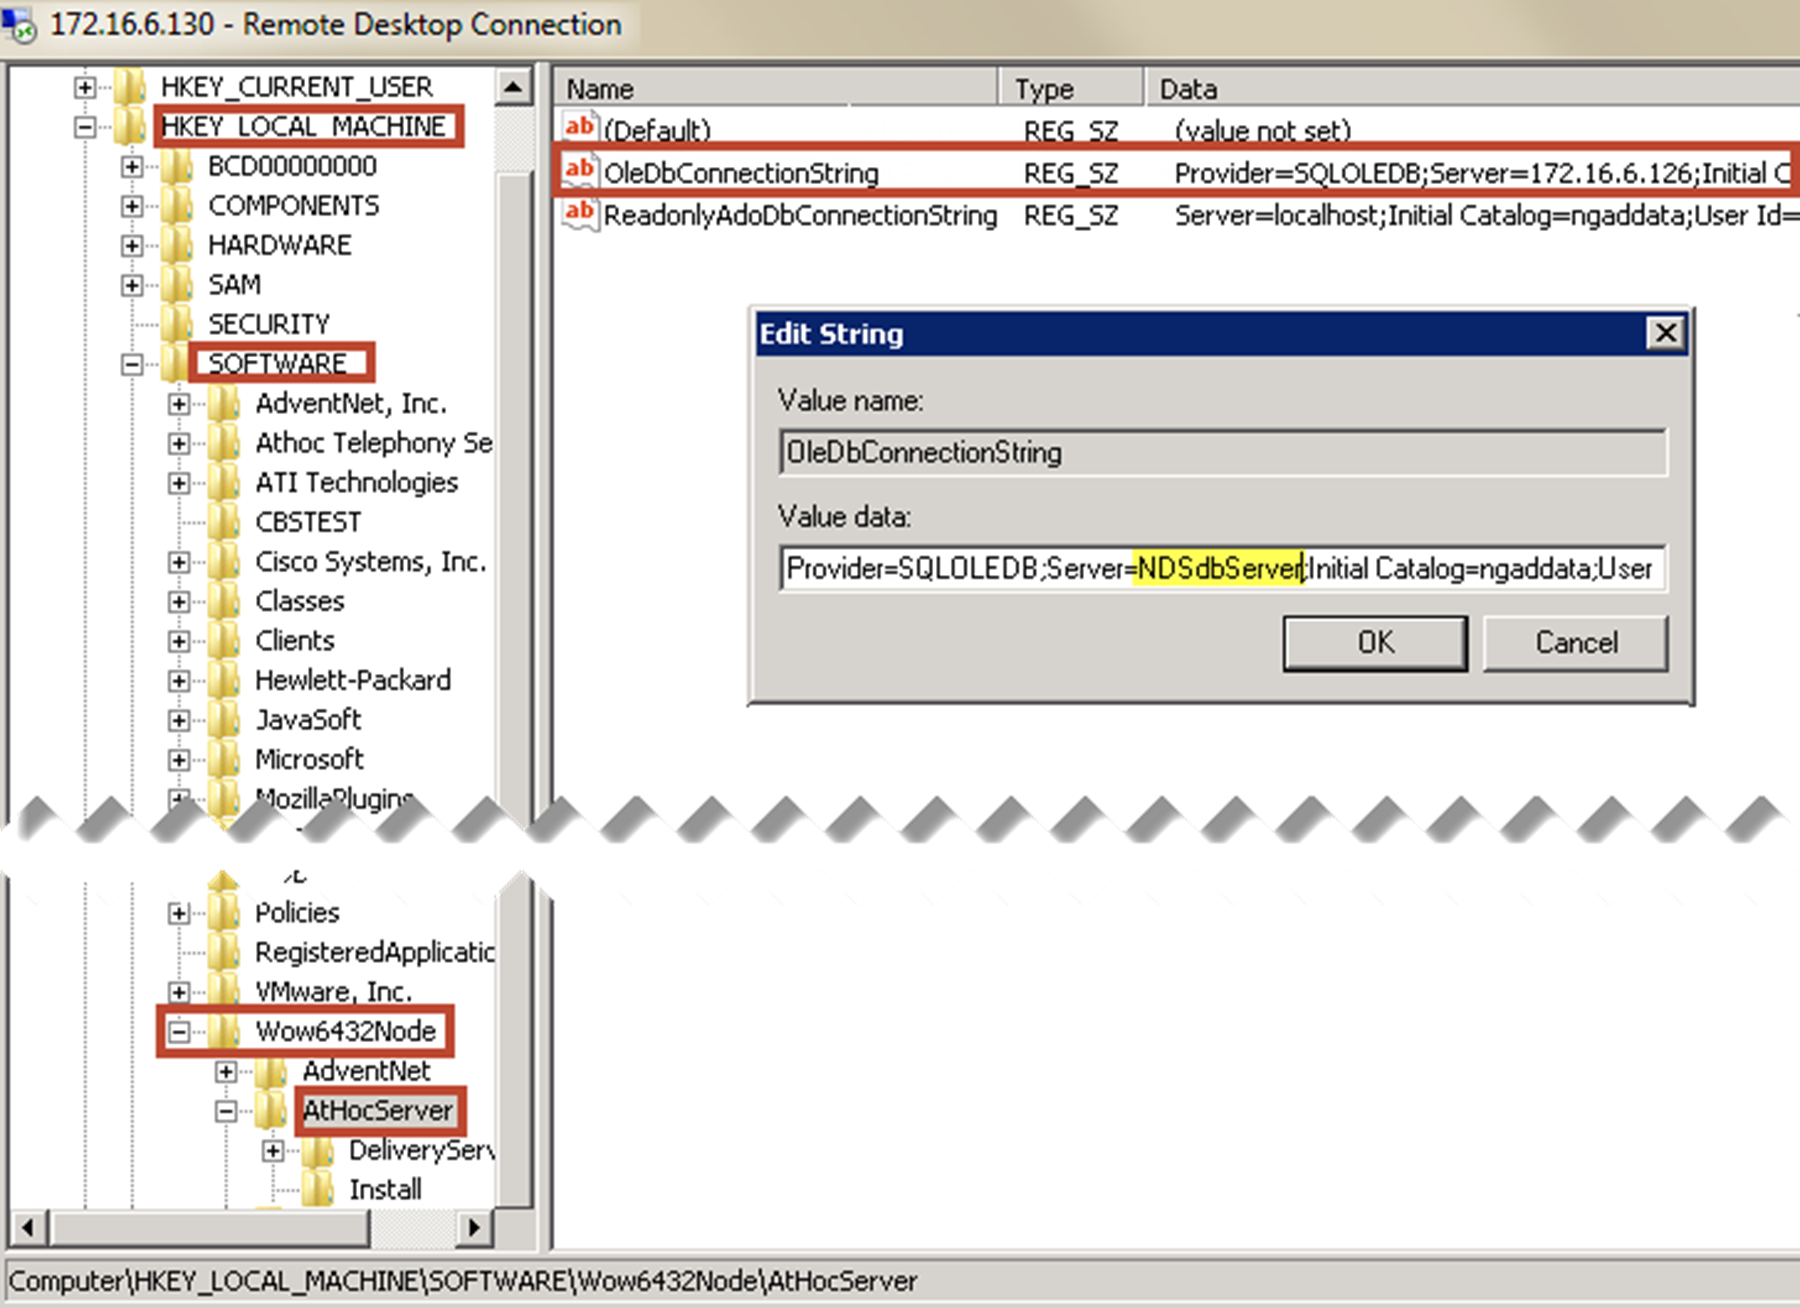
- Update the connections to the database server that have the NGDelivery and NGDiagnostics databases:
- OpenOleDbConnectionString.
- Change the server value to theNDSdatabase server and instance. In the same field, change the password value to the password of the NGAD user.
- ClickOK.
- For the plug-ins, expandAtHocServerand selectDeliveryServer.
- If you have customized the NGdelivery database name to include the plug-in device, selectConnectionStringand change the value tongdelivery_<plug-in>, where<plug-in>is the name of the plug-in device, such asTASorOPM. For example,NGDELIVERY_TAS.
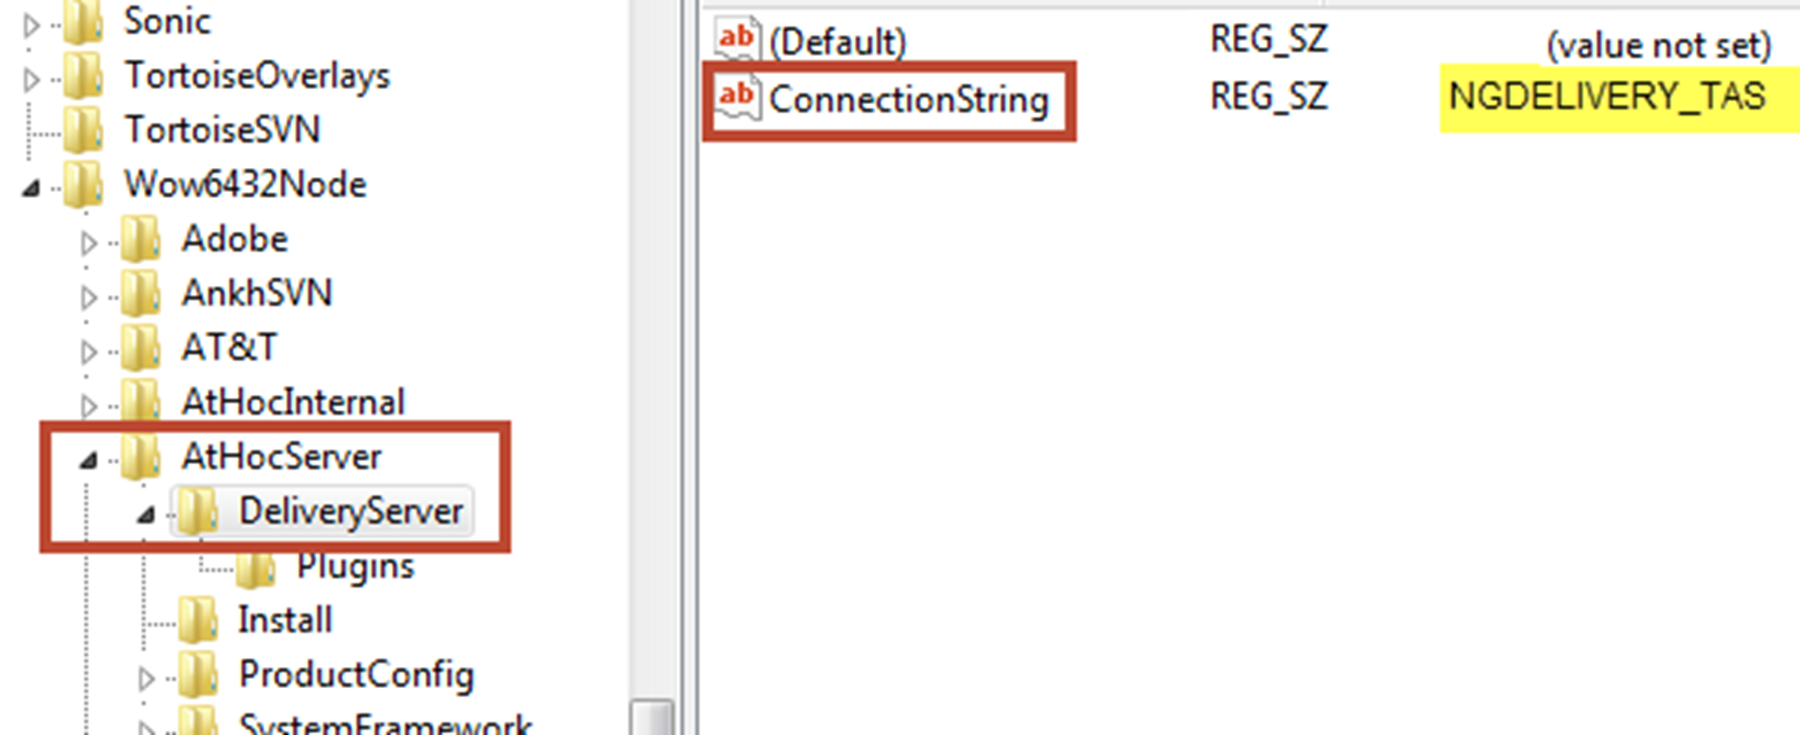
- ClickOKto save your changes.
- ConfigureNDSfor the NGDeliveryLog database server:
- Navigate toAtHocENS>DeliveryServer>Tools>NDSConsole.
- Open theNDSconsole and navigate toManagement>Configuration.
- Open the following configuration key:NDS.platform.deliverylog.
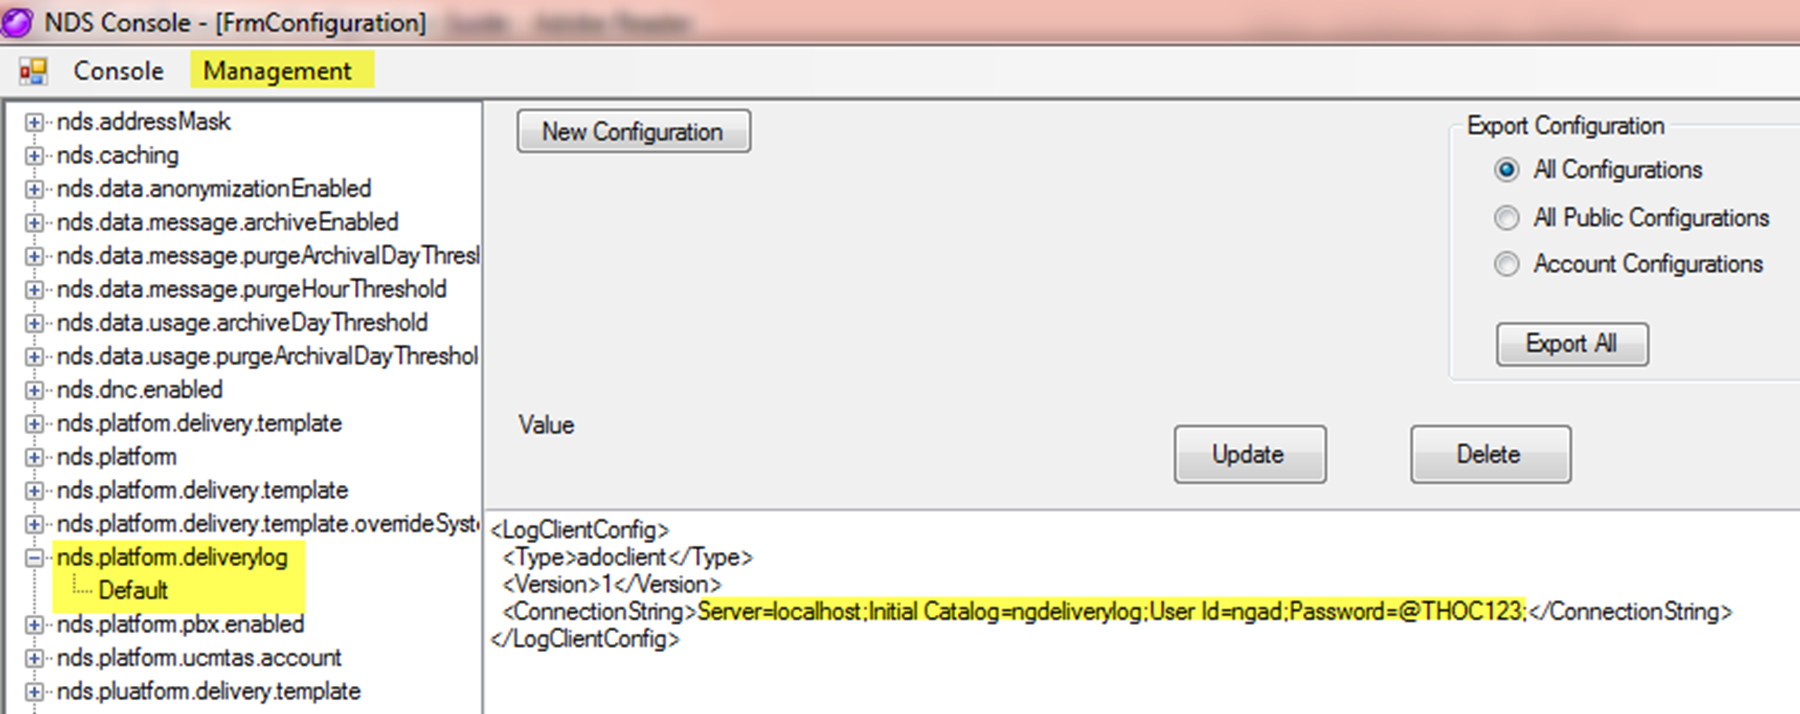
- Change the server value to theNDSdatabase server and instance to the database server you installed the NGDeliveryLog database on. In the same field, change the password value to the password of the NGAD user.
- ClickUpdate.
- RunAthocDeliveryServicefromServices.
You have now completed the installation. To verify the installation, see Verify the installation.